
Instagram has been growing exponentially day in and out.
And with such a rapid increase in the number of accounts in the Instagram community, it was a must thing to add an extra layer of security and bring new features to ensure user’s privacy.
Let’s admit it, not everyone wants to share your personal moment with all your followers.
This lead to the evolution of a trend called “Finstagrams“, where users created a new Instagram account to share select content with a small group of people consisting of their closed ones. It ensured the privacy of user content that was not seen by all their followers on their original account.
But managing multiple accounts is not everyone’s thing, justifying the trend was not for everyone. Hence, it called for a new feature that could power Instagram users to do so.
Referred to as “Close List”, finally Instagram rolled out this new feature globally that added flexibility to share your stories with exclusive viewing permissions.
This segmented list cut down the work of blacklisting people from your stories and share your stories with a select few.
How to Add People to the Instagram Close Friend List?
So basically there are two ways to add people to this list-
Method 1: From Story
- Open your Instagram and click on “Your Story” to create a new story.
- Choose a pic from your gallery or click one right then.
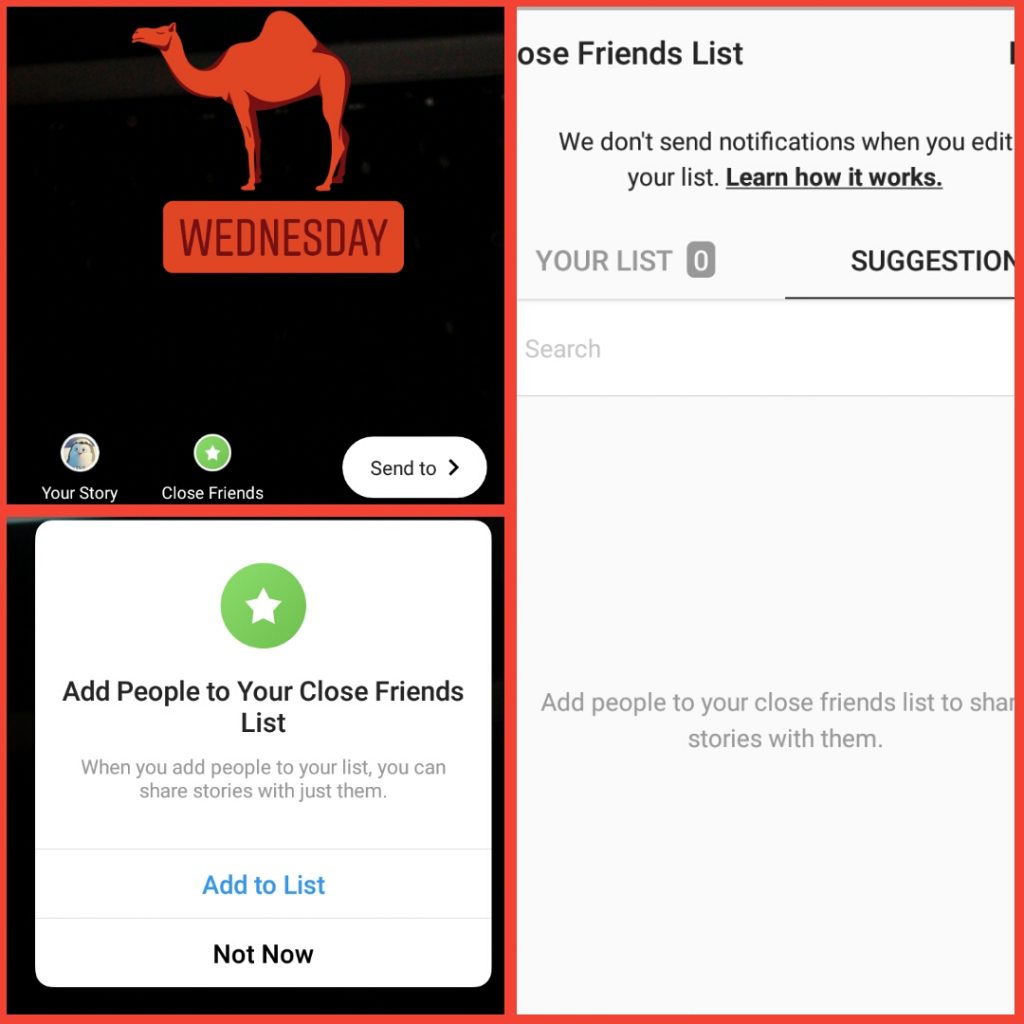
- Now click on “Close Friends” to create a new list.
- From the pop-up, select “Add to List” from the options.
- If it’s your personal account, it is most likely to suggestions according to who interact with the most. Since this account is just for tutorial purpose and I don’t use it, there are no suggestions on my list.
- In your case, there would be suggestions who you could add in your list.
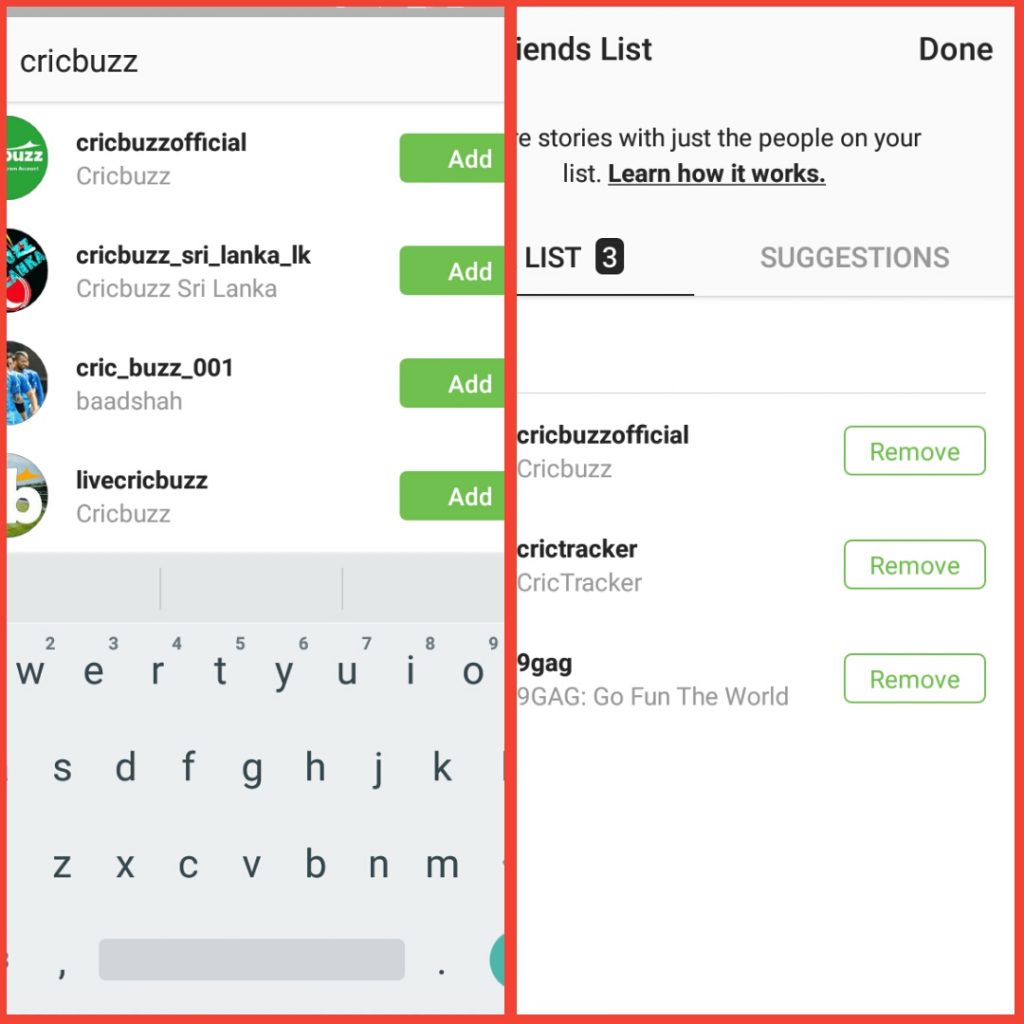
- If you want to add someone that Instagram didn’t suggest, just use the search bar and search for the username.
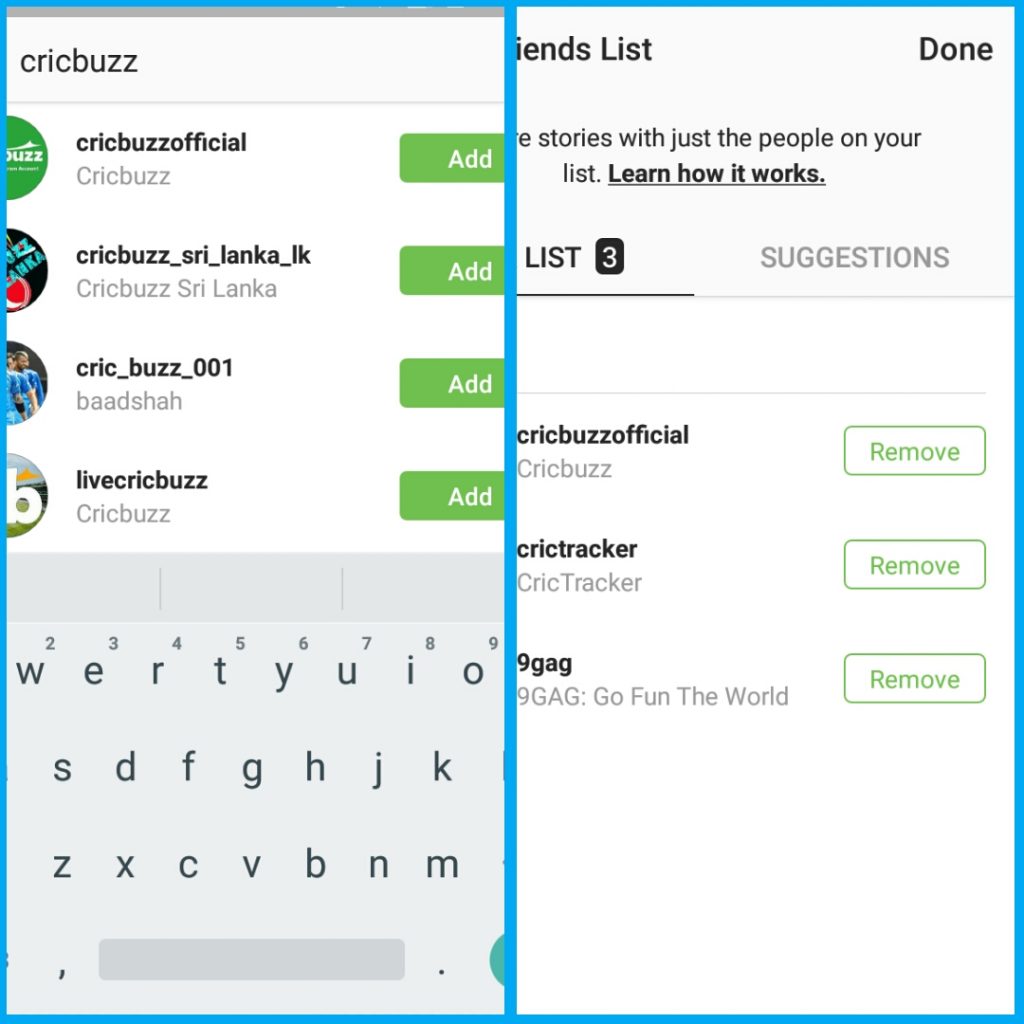
- When the username appears, click on the “Add” button to add a user to the list.
- When you are done creating the list, click “Done”.
P.S: You can use this method only if you haven’t created the list.
Method 2: From Profile
- Open your profile, and click on the three horizontal lines icon on the top right corner of the screen.
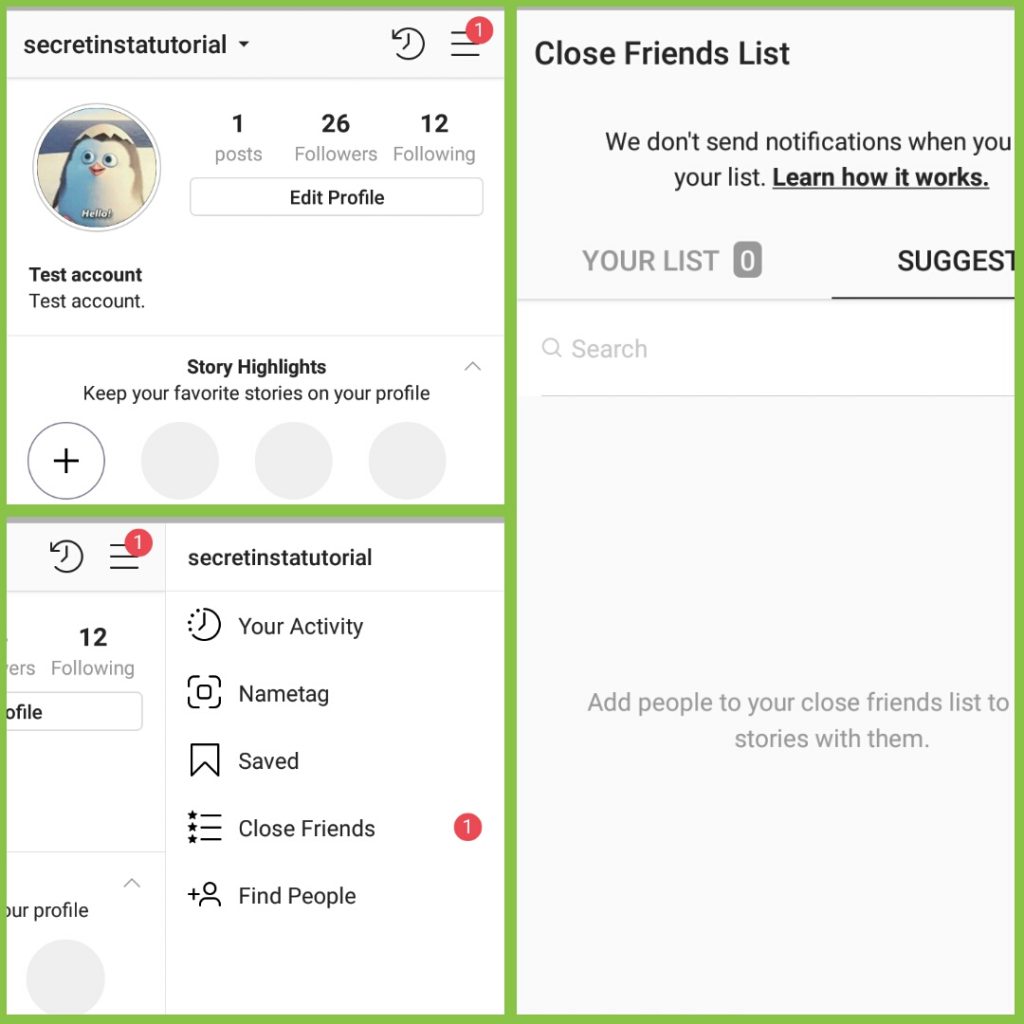
- From the options of the tray, click on “Close Friends”.
- The rest process for adding is the same as Method 1.
- Add from the suggestions or search the username using the search bar, and click “Add”.
- Check your list, and click “Done” on the top right corner of the screen.
- And now you can share your story with the close friend’s list that you created right now.
How to share stories with your close friend list?
Although it’s pretty much the same as sharing a normal story, there are just a few steps that need to be altered.
So without further ado, let’s see steps to share a story with your close friend list-
- Open your Instagram app, select the picture from the gallery you want to share with your close friend list.
- Customize the picture using filters, stickers or text according to your preference.
- Click on the “close friends” option in green at the bottom of the screen (see in the picture).

- Now your story is live for the next 24 hours among the followers you selected in the close friend list.
Did you start using awesome Instagram feature yet?
If yes, how do you use it?
Let me know in the comments section about it and please do share this article if you liked it.
Till then?
See you next time.
Bye-bye.
Part 2- 11 Most asked Q’s and A’s about Instagram’s Close Friend List
2 thoughts on “How to Use Instagram Close Friends List Feature in 2019”