
Hello everybody,
Did you capture something beautiful on your phone?
I know exactly what you are going to do now- POST ON INSTAGRAM!!!
Had it been the same scenario back in 2000, it would have been just a memory in your phone gallery.
Fortunately, we live in the era of the internet which has impacted our lives in every way shape or form, especially with social networking sites such as Instagram, Facebook, Snapchat etc.
Gone are the days when our special moments were just a subject of a collection in your gallery.
It’s the Instagram era.
You had a special moment at 5:31PM.
BOOM!
5:32PM- Posted!!!
Clicked a selfie at a party?
Posted!!!
Went for a trip to Bali???
Clicked and posted!!!
Instagram is a photo and video-sharing social networking service owned by Facebook, which acc. to latest reports, has grown from 90 million monthly active users in January 2013 to 1 billion monthly active users as of June 2018.
Created by Kevin Systrom and Mike Krieger, it was first launched in October 2010 that soon became a very powerful platform in terms of business marketing and increased in popularity from fashion bloggers to entrepreneurs day in and out.
Having said this, lemme share my selfie on Instagram. Please do like it.
What???
You don’t have an account on Instagram.
No matter whether you are an artist, a sports person, or a fitness freak, it’s about time you should get started and don’t miss out the opportunity to show your talents and explore the new world.
Joe made his account yesterday, so did Emma. Why should you wait anymore?
So without beating around the bush, let’s get started and show you a step-by-step guide to make your first insta account-
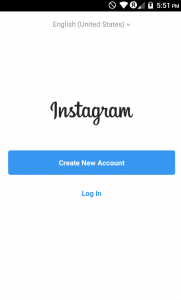
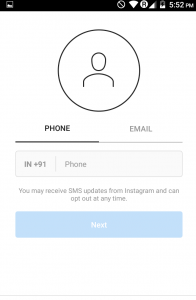
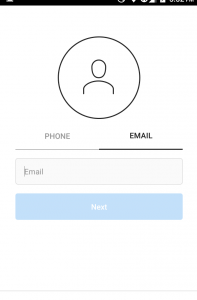
Step 1- As you see in the picture above, it’s the first thing you will see after you download and install the app. Since you are new to it, click on “Create New Account”. It opens a screen with two options (as seen in picture 2 and 3). You can proceed either with your phone number or your email id. Personally, I prefer email id, but you can input your phone number too.
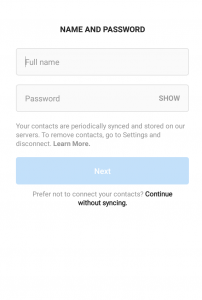
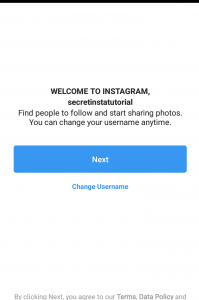
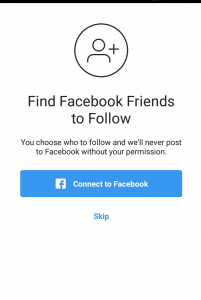
Step 2- After you have entered your email id or phone number, you will see the screen as shown in the picture. Enter your full name (put your brand name if it is a page of your brand) and password, then click “Next”. You will be given the option to change the username, change if you want or click next. As seen in the third picture above, it will then ask you to connect to Facebook. Connecting to Facebook account with this one lets your Facebook friends know who are already on insta. Since I am using this insta account for the tutorial purpose only, I am not going to connect to Facebook and click “Skip”.
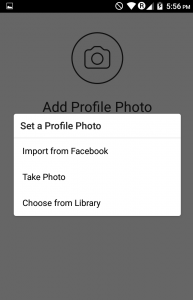
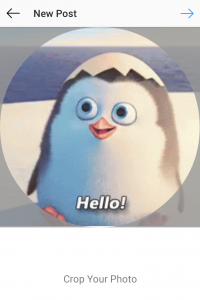
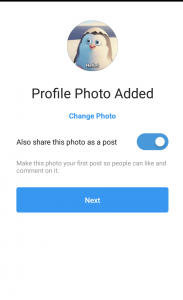
Step 3- After completing the first two steps, write your profile and put a profile picture so your account looks more authentic and trustworthy. (As seen in the first picture above) There are three ways to set your profile photo. If you have connected to your Facebook account in the earlier step (Step 2), you can import the picture right from there and add that as your profile picture. Choose “Take Photo” if you want to click your photo from your mobile camera. Click on “choose from library”, and select any picture from the gallery. After selecting the profile picture, (as seen in the picture) it gives you the option to crop, where you can crop if you want or click next. When it’s the first time it automatically gives you the option to share your profile picture as a post (seen in picture 3). Since I didn’t want it, I turned off the option and proceeded next.
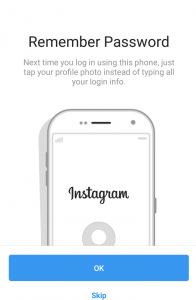
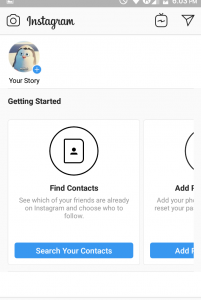
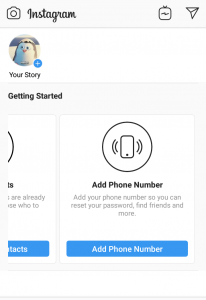
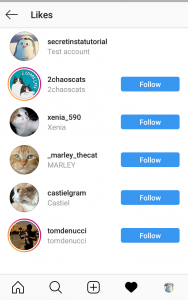
Step 4- (Picture 1) Click “OK” if nobody else uses your mobile phone or there is nothing personal that you want anyone to see. I personally “skip” this option because it gives a direct access just by tapping your profile photo to your account even to the person who doesn’t know your password and has your phone. (Picture 2) Click on “Search Your Contacts” to know and follow the people from your contact list here on Instagram. (Picture 3) Add your mobile number if you want so people who have your mobile number in their contact list know you are on insta and can follow you.
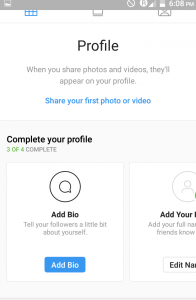
Step 5- Click on the arrow type of icon at the top right corner of your main screen. When you click there, you will see a screen as in picture 1. You will be given the option to add a bio (a little description about yourself), click on “add bio” and write something short and catchy that tells others about you. You can also add bio and website (only if you have one) by clicking the “edit profile” option next to your profile photo. After completing the above steps successfully, you are all set to share your first post.
Creating your first post in Instagram
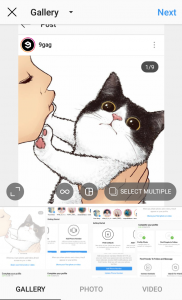
Step 1- Nothing could be as simple as posting on Instagram. Click on the “+” icon at the bottom of your screen as shown in picture 1. It brings us a screen that looks like picture 2. You can share pictures from your gallery (left option at the bottom), you can click and post (click option ‘photo’ at the bottom for this), or you can share a video (right option at the bottom of the screen). Click “select multiple” if you want to share more than one picture or video in a single post. After selecting your picture or video, click next.

Step 2- Write a captivating caption in the caption bar and add hashtags related to the picture. As seen in the picture above, when you type a word, it shows you the related hashtags that you can use and the numbers that represent the number of times the particular hashtag has been used. As my post has a cat, I used hashtags related to it.
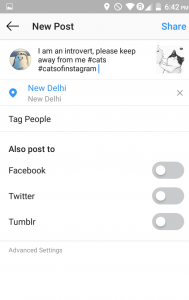

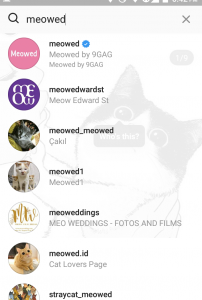
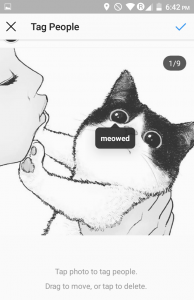
Step 3- You can also add location from the option. Simply write the location after clicking “add location” and select the option, or you can switch on your GPS and Google itself gives the exact options of your location. Although my post has nothing to do with location, I am adding New Delhi for tutorial purpose. Click on “tag people” for tagging a user, in my case the post had a cat so I tagged “Meowed” which is the biggest page on insta that shares pictures of cats. Check the top right corner (as in the picture) after tagging and click share. You could also share the same post from the options on Facebook, Twitter, and Tumblr if you have connected your insta account to those accounts.
BOOM!
You just shared your first post on insta.
I hope this step-by-step guide helped you getting started from making your account to sharing your first post on Instagram.
Lemme know in the comments section below about your views and suggestions and please do share if you liked our content.
See you next time!
Bye-bye.